Thursday, September 10, 2009

Shirt Pillowcase!

It's been very rainy for almost a week that one couldn't help but stay indoors and try do something productive or creative. I've been wanting to use my sewing machine but I do not have extra money to buy materials so I guess I was compelled to think about recycling.

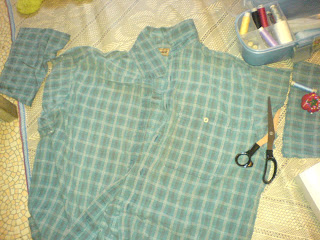
Whenever I get too lazy to do laundry and run out of clean pillowcases, I would use old shirts as pillowcases. Hence I thought of actually converting an old shirt that's about to be thrown or used as rag anyway into a pillowcase. Here's what I did:

1. Take the measurements: get the appropriate length and width of your pillow to be transferred to the old shirt.


2. Cut the sides to create a basic rectangle form (you'd have to cut most of the sleeves and the collar).


3. Sew the cut sides together and the seams ('pillowcase opening') if necessary.


4. Here's your new 'shirt pillowcase'! :

Saturday, September 5, 2009

Bubble Mania in Laguna

DSC00584

Nothing beats a weekend getaway out of Manila. I was so glad that my friends and I went ahead for a nearly-canceled 2-day vacation in Laguna at my landlady's "hacienda" =) Thanks to Anne who loaned me the fare as I was so destitute at that time, the main reason I was hesitant to join the trip.

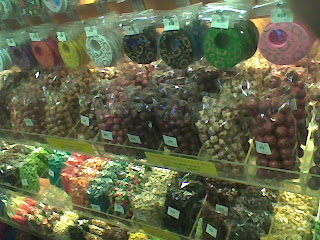
The getaway was only for a couple of days but I felt like it made me shed years of accumulated stress, tension, and cynicism. I think it was because of the BUBBLES!

We visited an old church and the girl selling bubble toys was so charming and effective in her sales pitch that we gave in. Who would have thought that the 20 pesos we spent on those toys were the best entertainment and rejuvenation investment we've made in years.

For every bubble that we blew, it was like a part of picture of our childhood was flashing back. Everyone among the four of us has spent a part or most of their younger years in the province so we couldn't help but reenact those olden summer days of chasing each other in the grass. Even my middle-aged landlady, her "already-mom" nieces, and (most appropriately) some of her grand-nephews joined the fun.

Bubbles... gosh... they're just Magical.

DSC00434 DSC00425 DSC00441 DSC00426

DSC00432 DSC00435 DSC00444

DSC00446 DSC00530 DSC00564

DSC00567 DSC00579 DSC00583

DSC00586 DSC00592 DSC00576

DSC00596 DSC00603 DSC00593 DSC00591

Monday, July 20, 2009

How Not to Mess Up a Fabric Stenciling Project

As part of my room decoration program, together with my arts and crafts crime partner Anne, I tried to create a curtain with my own design of prints. Fabric stenciling appeared to be very easy on books that we were more than excited to do it (for the first time). However, as we all know most first times are bound to be disasters. Yet you've got to admit that's where we get our best lessons.


1. Materials - fabric, scissors, cutter, sponge/paintbrush, paper/cardboard, pencil

*Lesson learned: It's best to use sticker paper or cardboard that's quite thick for the stencil pattern. Otherwise the pattern easily gets worn out because of the wet paint.


2. Create and cut the pattern - there are infinite possibilities for the design you might wish to use. Print or draw them on a cardboard/sticker paper. Cut out the parts where the paint will be applied within.

*Lesson learned: Intricate designs are ok but they make cutting an agony.
: Make sure the pattern is big enough or you'll really strain your eyes and hands.
3. Apply the paint - Place the pattern you've created on the fabric and apply the paint using a brush or sponge. The repetition and spacing of designs is entirely up to you.

*Lesson learned: It's best to use paint specially made for fabric design. We used poster paint and it'll probably disappear when the fabric's washed the third time.
: Do some trials first on a small piece of fabric before printing the "real thing"(we were wise enough to actually do this!).

So there, once we got it perfect you'll see the amazing photos.

Tuesday, July 14, 2009

Quiapo-Dapitan Tour: 2-Day Artsy Crafty Adventure

Finally, the pictures are in. So my friend Anne said Quiapo is one of the best places in the metro to find cheap textiles and accessories while we both discovered from an office colleague that Dapitan is the center of inexpensive native furniture and crafts.

Quiapo district is at the heart of Manila where the historical Quiapo church (built in 1586) is nestled. Dapitan on the other hand is a street/area near the boundary of Manila and Quezon City. A 15-20-minute ride separates these two spots (if you're lucky the traffic's not too heavy).

In Quiapo we indulged in a feast of colors as we visited specialty stores - fabrics, fashion accessories' materials, decorative papers, etc. I even had a gastronomic adventure when I first tasted this bite-size hotcake-like pastry sold in the sidewalk. I'm always hesitant about street food when not in my own neighborhood but they looked so yummy I bought myself a piece. It was indeed good I wish I had more. Problem is, I forgot what it's called. I swear I'll ask Anne!


We were under the impression the Dapitan stores close at 9p.m. we arrived there past 7. Unfortunately, almost all stores did already close when we got there we had no choice but to come back the following day.

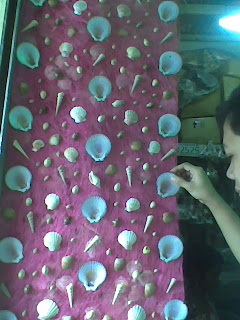
The morning after, we went back and it was what I had imagined from the pictures I had previously seen - rows of stores offering various items such as handicrafts, furniture, metalworks, china, vases, figurines (I was particularly fond of the huge "character Santa Claus" figurines - Santa Clause in a parachute, dancing Santa Claus, fishing Santa Claus, etc.). There were also wooden sculptures, bags, baskets, rattan/abaca carpets, shell products, toys, chandeliers, and all other sorts of imaginable household stuff made mainly from local raw materials.


Anne I and I were kind of broke all we could afford were a bamboo-rattan magazine holder and circular jewelry/accessories container - just so we could say we brought something home. There was so much to buy we went home heartbroken. However, it wasn't that bad as we originally intended to just look around and do some window shopping. Next time would be actual shopping time.


..and so we came this far to have almost ended up just eating pancit! =)

Wednesday, July 8, 2009

Dapitan is THE Destination!


photos courtesy of waypoints.ph

I have been so frustrated since last night when something just went wrong with my cellphone I couldn't transfer the pictures from my recent "room facelift" project. I was supposed to write three articles (with photos - many photos!) about my trip to a furniture/crafts flea market in the city; the sort of before-and-after status of my room improvement project; and my not-so-successful cloth stenciling attempt.

Until I am able to upload my own pictures, I guess I'd be grateful to showcase the ones posted by other bloggers about the Dapitan flea market. It's at the corner of Kanlaon and Dapitan Streets in Quezon City (Metro Manila, Philippines). An entire block occupied by numerous stalls, it is definitely a delight for the home decoration aficionados. The merchandise can be generally classified as "native" but very diverse that they range from rattan, wood, china, shells, glass, metal, and other materials. I believe many of the products here are export overruns but they're in such good shape you'd hardly notice that.

I was particularly looking for a cheap rattan bean bag base (and top it with a throw pillow) and a vintage slender brass lamp. Unfortunately there wasn't any (or there wasn't anything cheap enough) but I was glad I found a pretty rattan-bamboo magazine holder for only Php 100 (~$2).

There was so much to buy you'd really get confused. As my payday is still more than a week from now, I had to focus on just what I needed and set the panic buyer that we have in all of us aside. Afterall there'd always be a nice buy and I could just go back anytime.


photos courtesy of visitpinas.com

I promise, next time you'll see something more personal from me once my photos are uploaded.

Saturday, July 4, 2009

Ship in a Bottle!

One of my earliest fascinations with handiwork include ships-in-bottles being offered by merchants who go around town selling "door-to-door". They sell their merchandise by going from one household to another.

As far as I could remember, most of the time these merchants were ex-cons or ex-offenders who were either doing that trade for a living (as we may know, there aren't too many options for them) or were part of program wherein they help raise funds for offenders who are still inside prison. I recall some neighbors who bought these ships-in-bottles to help the inmates/ex-cons rather than out of pure interest in the items.

In my childhood I thought that only inmates were the ones who produced ships-in-a-bottle. Of course I've learned a long time ago that the craft is made countrywide (and worldwide) but up to this day I'm still enchanted whenever I see one.

Every kid (and even adults) would say "How did it get in there?". I used to believe the ship was some kind of balloon that expands whenever it got inside the bottle. That would be very easy right?

In truth, according to David S. Smith in his article How the Ship Gets in the Bottle..., "the work is extremely tedious and labor intensive. There are no shortcuts. I must painstakingly craft each separate piece of the model to the correct scale - never mind having to place them through the neck into the bottle afterwards, and working with 'mechanical fingers' eight inches (or more) away from my hands."

In the Philippines, I was able to find a wide selection of ships-in-a-bottle manufactured by Tigaon Handicraft based in Tigaon, Camarines Sur, Bicol region (I spent half of my childhood in this region, but in another province though!).

They offer miniature, medium, and large-size ships-in-bottles. There are even wedding souvenirs/give-aways (if you attend a Filipino wedding, you'll get a souvenir). Here are the samples:

(*Items are all handmade and inserted through the bottleneck. 'Ships' fixed at the glassputty "ocean" and item can be easily transported. The cork is sealed with real sealing-wax.)

Miniature:

miniature1

Miniature SEUTE DEERN 50 cc (7.2x4.5 cm). approx. US $3.00

miniature2

Miniature SANTA MARIA 50 cc (7.2x4.5 cm). approx. US $3.00

Medium:

medium3

Medium PASSAT 375 cc flat Lapad Bottle (21x9 cm). approx. US $12.00

medium1

Medium Whaler CHARLES W. MORGAN (Moby Dick) 375 cc square Gilbeys Gin Bottle (19x8 cm). approx US $16.00

This Ship-in-Bottle is constructed in the so-called "perfect hair system." (PHS) All the " strings" of the rig are made of real animal and human hair. The model is first built and completely finished outside the bottle. Then, each mast, including sails etc., is removed again. After that the hull is inserted into the bottle. Then each mast is individually added and all is glued into place.

This technique makes it possible to reproduce fine details because pressure on the rig is minimal and more delicate materials can be used. Also the hull and superstructure can be larger since they take up the entire diameter of the bottle neck. Building models in this technique is rather time consuming and requires great skill. This explains the difference in price as compared to models of traditional design.

Large:

large2

RICKMER RICKMERS 1 Gallone Bottle (33x16 cm). approx US $63.00

Wedding souvenir:

weddingSouvenir

*photos and item information taken from Tigaon Handicraft.